

Build Modern Web Applications using ReactJS #3.
Learn how to make a React application more interactive. Additionally, learn how to deal with higher-order components, props, states.

I am a FullStack Software Developper . As part of the learning process , i decide to start sharing with you what i learn on this plateform .
🥳 Hello and welcome! 👋
This is part of a series of articles. If you are new and would like to begin with the first post, click here.
In the previous post, we covered the React component, JSX in depth and some of the new ES6 features essential for learning React.
This post will introduce react hooks and teach how to add interactivity to a React application and how to handle events. We'll also learn the concepts of higher-order components, props, and states.
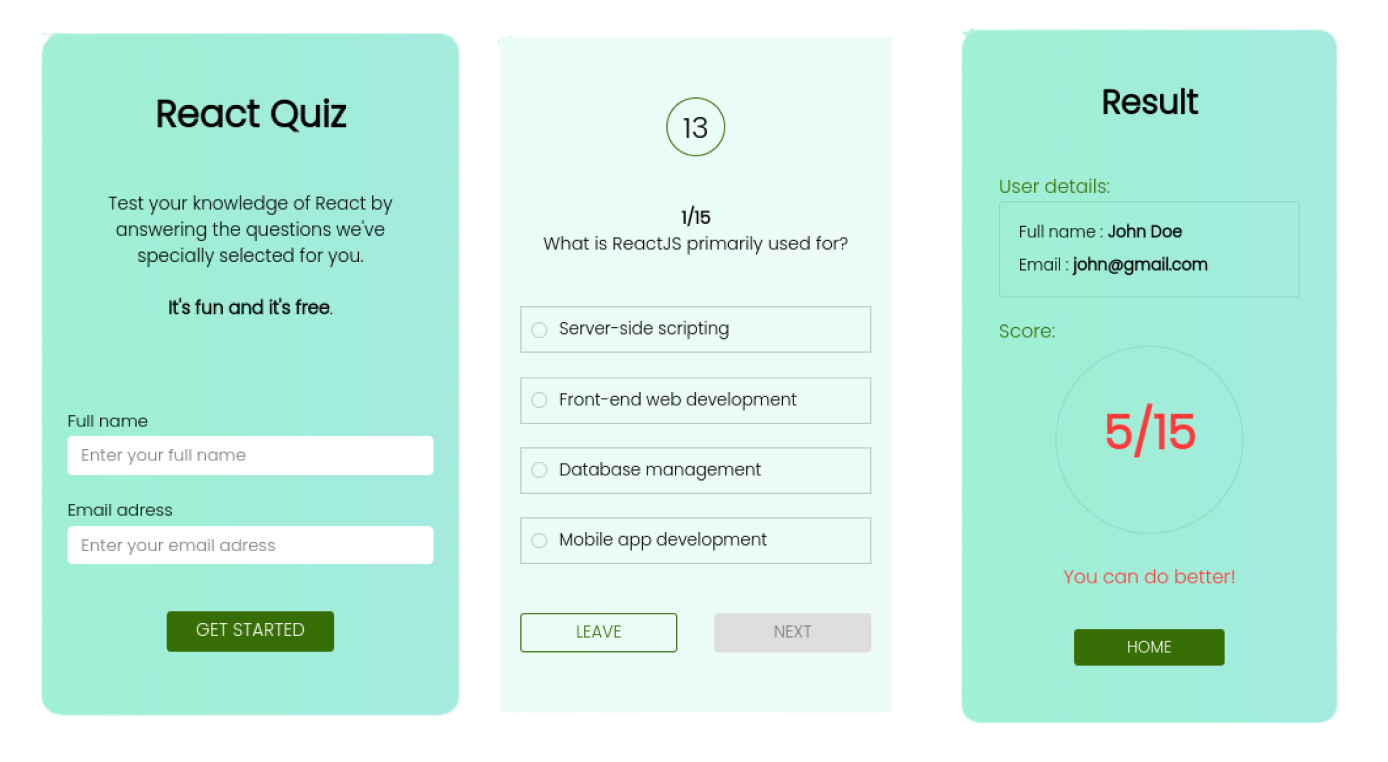
At the end of this chapter, we will be able to build a dynamic quiz app that implements the concepts of props, higher-order components, event handling, and state:
Let us go 🚀
So far, we have only dealt with functional components; however, in React, a component can be of two types: class components and functional components. I had planned to use only functional components for this series of articles. But for learning purposes, we will take a look at class components.
To create a class component in React, we use the ES6 class keyword and extend theComponent class provided by React like this:
class App extends React.Component {

    render(){
      return (
        <h2>
            Hello word
        </h2>
      );
    }
}

const rootElement = document.getElementById("root");
ReactDOM.createRoot(rootElement).render(<App />);
Here, the render method is the only required and most important method. It is responsible for rendering the component.
The class-based method was widely adopted since it was typically the developer's only option. This is mainly due to the ease with which component life cycle approaches and state management were managed. However, with the introduction of React Hooks, everything changed.
Before introducing hooks in this post, let us see what a state is and how it is implemented for a class component. We will also see how to implement it with hooks (in a functional component) and then understand why the official React documentation encourages developers to adopt React Hooks to manage state with functional components when writing new code rather than using class-based components.
React component state
State management is an important skill in React since it allows you to create interactive components and dynamic web apps.
React provides a simple and adaptable approach to implementing state management in a React component.
What is a state?
In a component, the state represents a dynamic property at a given time. You can consider it a dynamic data store for the component; whenever this data (state) is changed, the component will be re-rendered with the new data (state).
How does the state work?
For each interaction, components frequently need to update what's on the screen. Clicking the filter button on a list should update the list with filtered items, and switching the dark mode should make the text a light color and the background a dark color; since those details change along the use of the component (user interaction), they have to be saved somewhere (variable), and tracked so that the component can update the UI. This kind of place is called the state in React.
You can consider it a dynamic data store for the component; whenever this data (state) changes, the component is re-rendered with the new data (state).
Ex:
Analyzing a real-time clock component is a basic example of how to better understand state management. Here, the job is to display the time. Because the time changes every second, the clock component must keep the current date and time in its state. Because the clock component's state changes every second, it must be re-rendered every second, as mentioned.
We are going to implement the real-time clock component with both class and functional approaches:
class-based component
import ReactDOM from "react-dom/client"; import React from "react"; class App extends React.Component { state = { time: new Date(), }; tick() { this.setState({ time: new Date(), }); } timerId = setInterval(() => this.tick(), 1000); render() { const { time } = this.state; const hours = time.getHours(); const minutes = time.getMinutes(); const seconds = time.getSeconds(); return ( <div className="clock"> <h1>Real-Time Clock</h1> <p> {hours}:{minutes < 10 ? `0${minutes}` : minutes}: {seconds < 10 ? `0${seconds}` : seconds} </p> </div> ); } } const rootElement = document.getElementById("root"); ReactDOM.createRoot(rootElement).render(<App />);stateis a specific property for class-based components that holds those dynamic variables for the component, in our instance, the time. Since we can point to the current object/class using thethiskeyword, we can access the state anywhere in the component by typingthis.state[property].To update the state, we use a special method called
setStatethat is already implemented for the baseComponentclass.setStatetakes as arguments an object containing the new values :this.setState({...}).Here, the tick function is in charge of keeping our state up-to-date by setting each second to the new time thanks to the
setInterval. That means the component will be re-rendered each second with the new time.
We can see that everything is going as expected. Our UI is in real-time. However, we can notice that it is difficult to extract this state logic from our component and use it in a separate component. It's one of the drawbacks that React hooks will address.
React Hooks allows you to separate your stateful logic into reusable functions called hooks, which can then be utilized in your function component and other components. Let see how:
Functional component:
 import ReactDOM from "react-dom/client";
 import React, { useState } from "react";

 function Clock() {
   // Declare a new state variable called time
   // with new Date() as default value
   const [time, setTime] = useState(new Date());

   let timerID = setInterval(() => setTime(new Date()), 1000);

   const hours = time.getHours();
   const minutes = time.getMinutes();
   const seconds = time.getSeconds();

   return (
     <div className="clock">
       <h1>Real-Time Clock</h1>
       <p>
         {hours}:{minutes < 10 ? `0${minutes}` : minutes}:
         {seconds < 10 ? `0${seconds}` : seconds}
       </p>
     </div>
   );
 }

 const rootElement = document.getElementById("root");
 ReactDOM.createRoot(rootElement).render(<Clock />);
This new function
useStateis the first "Hook" we'll look at. Don't worry if it's not clear yet! I am going to explain everything you need to know.As you can see here, the stateful logic is a separated function (
useState).
Introducing hooks
Before the release of React version 16.8, developers could only handle state and other React features using class components. However, in version 16.8, React introduced a new pattern called hooks.
In this section, we'll go through the basics of React Hooks. The goal is to show you that React Hooks are simple to learn, create, and use.
Before embracing the topic, I want you to think of hooks as vanilla JavaScript functions that manage certain tasks when rendering a component.
In JavaScript, functions are composable, which means we can call a function A in another function B and use the return value of A in B :

In code, it will be like this:
// An isolated function (logic)
function B() {
    // some code
}

function A () {
        // some code
    let result = B()
        // code

    return result * result
}
In the first post, we saw that functional components are also vanilla JavaScript functions that return JSX. So if functions have composability, React components can also have composability. That means we can also compose (use) another function inside a React component.
As hooks are also vanilla JavaScript functions, they can be used inside a React component and still be reusable in other components since their definitions are isolated.
Now that we have an idea of what a hook is in React, let us meet our first hook : useState.
useState hook
Consider the following counter component :
function App() {
  let count = 0;

  function handleCount() {
    count++;
  }

  return (
    <>
      <div className="clock">
        Counter : {count}
        <button onClick={() => {
          handleCount();
          console.log(count)
        }}>Add</button>
      </div>
    </>
  );
}
Clicking the Add button should now increment the count value. Let us see the result:
We can see that the count value changes in but is not updated in the UI! The handleCount function modifies the value of count and prints it to the console. However, two factors prevent that change from being visible:
Changes to local variables won’t trigger renders for a component. When a change is made to a local variable, React is unaware that it needs to re-render the component.
Local variables fail to persist in renderings. Even if React could render this component a second time, it won't consider any change in local variables.
Two things must happen to update a component with new changes (states):
Trigger React to re-render the component with a new state.
When re-rendering, keep all variable modifications.
These two things are provided by the useState hook.
useState allows us to add a state variable to your component that will be remembered whenever it is updated and if so trigger the re-rendering of the component. useState is a JavaScript function in the React library. So we will be importing it from React before using it. This function returns an array with two values when we call it:
the state variable: to keep data. The data will be saved between renderings thanks to this state variable.
the state setter: a function that will allow to update this state variable and trigger a re-render.
Because useState returns these two items in an array, we can destructure them, assign them to local variables and name them whatever we want. Let us add a state variable to our counter component and see the difference:
function App() {
  let [count, setCount] = useState(0);

  function handleCount () {
    setCount(count + 1);
  }


  return (
    <>
      <div className="clock">
        Counter : {count}
        <button onClick={() => {
          handleCount()
          console.log(count)
        }}>Add</button>
      </div>
    </>
  );
}
The convention is to name those variables like [something, setSomething]. But you can name them whatever you want.

First render. The counter component renders for the first time and the
useStatefunction returns[0, setCount]because we specified 0 as the initial state; react is aware of this.Update the state variable. When a user clicks the
Addbutton,setCounter(counter + 1)is called. Because thecountvariable is set to0, thesetCounterfunction sets it to1and tells React to remember that the count is now1, which triggers a new render.New render. When re-rendering, React still has
useState(0), but because React remembers that you setcountto1, it returns[1, setCounter]instead.
The same scenario will happen when the state changes again and again.
You can also add multiple state variables to your component:
function App(){
    const [count, setCount] = useState()
    const [toggle, setToggle] = useState()
    //....
If the variables of the state are unrelated, such as count and toggle in this example, it is a good idea to have many state variables. However, if you frequently update two state variables at the same time, it may be better to consolidate them into one. For example, if you have a form with numerous fields, having a single state variable that holds an object is more useful than having a state variable for each field. We will see how to choose a good structure for our state later.
Now that we understand how useState works, let us see how to deal with it:
The state is detached and private.
Since a hook is an isolated javascript function (as stated when introducing hooks) that is called inside a component, we need to know that the implementation of this hook is also detached from the component. That means that the data stored in the state variables live one level outside of the component so we can use them when rendering the component.
This state is private to a specific instance of the component. It means that if we are displaying (rendering) the same component twice, each instance will have its own private state. Changing the state in a given instance will not affect other instances's states.
function CounterApp() {
  let [count, setCount] = useState(0);

  function handleCount () {
    setCount(count + 1);
  }


  return (
    <>
      <div className="clock">
        Counter : {count}
        <button onClick={() => {
          handleCount()
        }}>Add</button>
      </div>
    </>
  );
}

function App() {

  return (
    <>
      <CounterApp/>
      <CounterApp/>
    </>
  );
}
The initial state
useState takes a parameter, which is the value you want the state to be initially; it can be of any type (number, string, array, function, object, etc.). However, functions passed as initial states behave differently. They are treated as initializers; used only for the initial render, they are ignored for the subsequent renders.
If you pass a function as an initial state, it should be pure, accept no arguments, and return a value of any type that will be considered as initial value.
function App() {

  function initList() {
    const initialList = [];
    for (let i = 0; i < 5; i++) {
      initialList.push({
        id: i + i,
        text: "Item " + (i + 1),
      });
    }
    return initialList;
  }

  // using initialiser function
  const [list, setList] = useState(initList);

  const [text, setText] = useState("");

  function addNewItem() {
    setText('')
    setList([{ id: text.length + 1, text }, ...list]);
  }

  return (
    <>
      <div>
        <input
          value={text}
          onChange={(e) => setText(e.target.value)}
          type="text"
        />
        <button onClick={addNewItem}>Add</button>
      </div>
      <ul>
        {list.map((item) => (
          <li key={item.id}>{item.text}</li>
        ))}
      </ul>
    </>
  );
}
Here, React will only use the initList function to initialize the state on the first rendering and not for subsequent re-renders (e.g.: typing in the input field (updating the text state variable)).
initList, which is the function itself, rather than initList(), which is the function's return value. React will only call the function you pass to useState during initialization (first render). However, if you pass a function and call it directly, it will run on every render, such as when you enter the input (in our case). Although there is no noticeable distinction in the UI, this implementation is less efficient.React will call your initializer function twice in Strict Mode to assist you in discovering if it is pure and other unintended matters. This is just a developmental activity. This shouldn't impact the functionality if your initializer function is pure (as it should be).
useState is a hook, it can only be called from the top level of your component or in your custom hooks. It cannot be invoked within loops or conditions. Learn more about why you should respect this rule hereThe state setter function
We've seen that the state setter is one of the items returned by useState. It will be used to update the state variable, which will automatically cause the component to re-render.
You can call it and directly pass the new (next) value of the state as an argument to it
setSomething(newValue):function App (){ const [toggle, setToggle] = useState(false) function handleClick () { if (state){ setToggle(false) }else{ setToggle(true) } } // .... }Or call it and pass a function that calculates the new state value from the previous state value:
  function App() {
    const [toggle, setToggle] = useState(false);

    function handleClick() {
      setToggle((prevState) => !prevState);
    }

    return (
      <div>
        <h3>{toggle ? "Black" : "White"}</h3>

        <button onClick={handleClick}>Change theme</button>
      </div>
    );
  }
Here, the function passed to the state setter is treated as an updater . It should take the current state as its only argument and return what will be the next state. React will put it in a queue and use it when re-rendering the component. During the next render, React will determine the next state by calling all pending updaters in the queue of the corresponding state. We can provide multiple updaters:
  function CounterApp() {
    const [count, setCount] = useState(0);

    function handleClick() {
      // using updater functions
      setCount((count) => count + 1);
      setCount((count) => count + 1);
      setCount((count) => count + 1);
    }

    return (
      <div>
        <h1>Count :</h1>
        <p>{count}</p>
        <button onClick={handleClick}>Inc</button>
      </div>
    );
  }
As you can see, we use
setCountthree times to update thecountvariable, but instead of giving the new number directly, we use updater functions. As previously stated, the updaters will be added to a queue, and the next rendering will use this queue by calling all queued updaters for thecountto determine the new (next) value ofcount, knowing that the return value of an updater in the queue will be the argument of the next updater.The
countis set to 0 (initial state) for the first rendering. When the user clicks on theIncbutton, thehandleClickmethod is invoked, and enqueues three updaters for thecountstate.When the execution of
handleClickis completed, a re-rendering will be triggered; when re-rendering, the first updater will be called with the previouscountvalue (0) performingprevState+ 1 resulting in 1, then the next updater will use 1 as theprevStateand performprevState+ 1 resulting in 2, then the next updater will use 2 and performprevState+ 1 that results in 3. Because there are no longer any updaters in the queue, the next value ofcountwill be set to 3.
If we try to do the same by passing direct a value to the setter function, the behavior will not be the same since a direct value overwrite the previous in the queue:
  function CounterApp() {
    const [count, setCount] = useState(0);

    function handleClick() {
      // using direct values
      setCount(count + 1);
      setCount(count + 1);
      setCount(count + 1);
    }

    return (
      <div>
        <h1>Count :</h1>
        <p>{count}</p>
        <button onClick={handleClick}>Inc</button>
      </div>
    );
  }
Here, the last
setCountstatement overwrite the previous value and the final result will be0 + 1which is like incrementing one time even if we use 3setCountstatements.
With can also combine updaters with setting direct value since everything use of the setter function enqueues the parameter passed to it. Knowing that value passed directly overwrite the previous:
  function CounterApp() {
    const [count, setCount] = useState(0);

    function handleClick() {
      // pass direct a value
      setCount(count + 1);
      // use updater
      setCount(count => count + 4);
    }

    return (
      <div>
        <h1>Count :</h1>
        <h3>{count}</h3>
        <button onClick={handleClick}>Inc</button>
      </div>
    );
  }
Relationship between state and renders
When a re-rendering is triggered:
React calls your function (Component) again.
Your function returns a new JSX.
React then updates the screen to match the JSX returned by your function.
If there are local variables in the component, they will be forgotten when calling the function again because they live in that function. Since state variables do not live inside the function (component), they will not disappear, and we can reuse them in the next render. React will them to update the JSX.
So, when a setter function (setSomething) updates a state and triggers a new render, React will pass this update (or those updates) like a snapshot to the newly rendered component so that it can use this snapshot to update the JSX. If the state changes again, React will take another snapshot of the changes and pass it to the next rendering. Here, it is simple to understand that each rendering has a specific snapshot of the state to use; whenever we use them in the component, it will refer to that snapshot. Let us understand it with an example:
function CounterApp() {
  let [count, setCount] = useState(0);

  function handleCount () {
    setCount(count + 1);
    console.log(count)
  }

  return (
    <>
      <div>
        Counter : {count}
        <button onClick={() => {
          handleCount()
        }}>Add</button>
      </div>
    </>
  );
}

Here, we see that the value printed in the console is not the same as the value displayed in the UI. The reason is that when we call the handleCount function, it changes the state with setCount (that means triggering a new render). This change will help to create the state snapshot of the next rendering; however, this change cannot be used in the current rendering because we already have a snapshot for it. In the next section we will see that state variables are read-only. Because handleCount is called in the current rendering, accessing the state variable will refer to the current state snapshot rather than the next snapshot.
A similar situation can happen if we try to change the state multiple times by passing directly the next value as a parameter to the setter function:
function CounterApp() {
  let [count, setCount] = useState(0);

  function handleCount () {
    setCount(count + 1);
    setCount(count + 1);
    setCount(count + 1);
  }


  return (
    <>
      <div className="clock">
        Counter : {count}
        <button onClick={() => {
          handleCount()
        }}>Add-3</button>
      </div>
    </>
  );
}
In this example, you could expect pressing the Add-3 button to increase the counter three times because it calls setCounter(count + 1) three times. Unfortunately, it will not happen as expected. If you click the Add-3 button, count in the next rendering will increment by 1. In the previous section, we saw that all changes caused by the setters function are only accessible in the next render. The value of count is 0 for the current rendering, even after a setter function setCount(count + 1) is called.
If we want to increase count three times, we need to use updater functions setCount(count => count + 1).
a, the next render will wait for the execution of a (not the return value) to finish before re-rendering. If a is a promise, react will not await its response.function CounterApp() {
let [count, setCount] = useState(0);
function handleCount () {
setCount(count + 1);
setCount(count + 1);
console.log('First log')
setCount(count + 1);
console.log('Second log')
// end of the execution
return new Promise((resolve, reject) => {
setTimeout(() => {
resolve('Promise response => ' + count)
}, 2000)
})
}
return (
<>
<div className="clock">
Counter : {count}
<button onClick={async() => {
console.log(count)
console.log(await handleCount())
}}>Add</button>
</div>
</>
);
}

The promise response is 0, as you can see, because it was called in the previous rendering when count was 0.
Treat state variables as immutable
In other words, you should treat any JavaScript object that you put into the state as read-only, just as we have done with strings, numbers, and booleans so far. To modify the count variable, we used setCount(newValue), which replaces the existing value with the new value.
React encourages us to take the same approach when working with other types of data, like objects, arrays, and so on.
Why?
Let us understand it with an example:
Consider the following registration form component:
function RegistrationForm() {
  const [formData, setFormData] = useState({
    name: '',
    email: '',
    password: ''
  });

  const handleSubmit = (e) => {
    e.preventDefault();
    console.log('Name:', formData.name);
    console.log('Email:', formData.email);
    console.log('Password:', formData.password);
  }

// ......
}
We can be tempted to update the email like this: formDate.email = 'newemail@gmail.com' . This approach will not work in most cases because here, react does not know if it has to re-render, apart from that, we are modifying a local variable.
  // useState without destructuring
  const state = useState(0);
  const count = state[0];
  const setCount = state[1];

  // The same thing with destructuring
  const [count, setCount] = useState(0);

// count and setCount are local variable now

count = count + 1
// modify a local variable
To update this state (object), we need to create a new one with updated values:
// ....
const [formData, setFormData] = useState({
    name: '',
    email: '',
    password: ''
  })

setFormData({
    // copy the formData object
    ...formData,
    // update or add new property : value
})
// ....
For arrays, instead of using methods like push, unshift, etc., it is more convenient to create a new array and add new items inside it. For example, to add items, we can do this:
// ...
const [list, setList] = useState(['John', 'Doe'])

setList([...list, 'socrate'])
We can use methods that return new arrays, like filter, map.
Communication between components
Communication between components is an essential aspect of the UI architecture, especially with large and more complex web applications. Components are functional in nature: that is, they receive information through arguments and use them in their return. This is called unidirectional data flow.
Let us see how we can establish a communication using props:
Props in React
Props, short for "properties," are a fundamental React technique for sending data from one component (parent) to another (child). They enable you to develop adaptable and reusable components capable of receiving and displaying dynamic data. Understanding how to correctly use props is important for constructing strong and maintainable React applications.
We saw that in React, functional components are like functions that produce a specific output (JSX), which is a part of your user interface. Just like functions can accept parameters to customize their behavior, React components can receive props as parameters to customize their appearance and behavior.
Analogy
Imagine you have a function generateGetting that greets people. This function takes the person's name as a parameter and returns a personalized greeting message for this person.
function geerateGretting (name) {
    return `Hello ${name}`
}

/**
* geerateGretting('John') ==> Hello John
* geerateGretting('Alice') ==> Hello Alice
*/
We see that for a given input, we have a personalized output. We can do a similar thing with a React component.
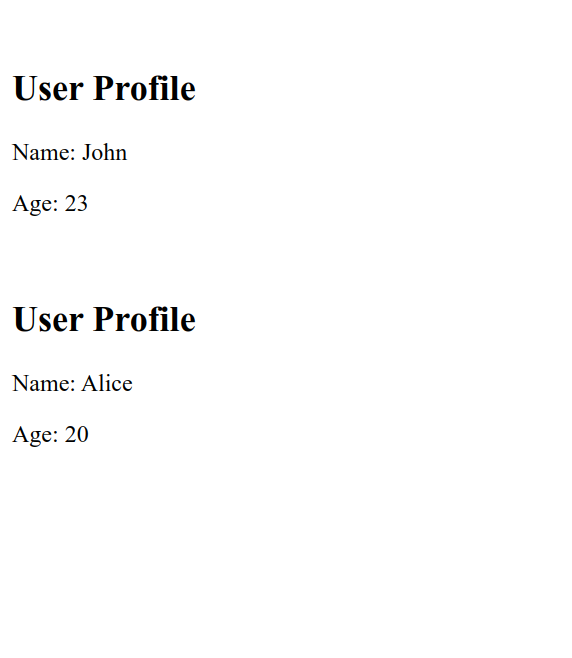
Let us assume we have a dynamic UserProfile component that is in charge of displaying user details.We want our component to be dynamic, which means there will not be hard-coded user information inside it, so we need to provide those details when calling the component. Props (an object) is a specifial argument in React that allows functional components to receive data in the format of (key/value). In our case we can pass user details via props:
function UserProfile(props) {
  return (
    <div>
      <h2>User Profile</h2>
      <p>Name: {props.name}</p>
      <p>Age: {props.age}</p>
    </div>
  );
}
As you can see, there is no hard-coded information here; instead, we use data from the props argument. Those data can change accordingly to an instance of this component:
<p id="123"></p>). However, for components, values are enclosed inside curly braces {}.
function App() {

  return (
    <>
      <br />
      <UserProfile name={"John"} age={23}/>
      <br />
      <UserProfile name={"Alice"} age={20}/>
    </>
  );
}
Since props is an object, we can destructure it and set the default value or even use aliases as seen in the previous post when talking about ESC6:
function UserProfile({name : userName = 'N/A', age}) {
  return (
    <div>
      <h2>User Profile</h2>
      <p>Name: {userName}</p>
      <p>Age: {age}</p>
    </div>
  );
}
This approach allows transferring data from a parent component to a child component unidirectionally; we cannot do the reverse (child to parent). When we are dealing with stand-alone components that have child components, we can pass the parent state as props to the children and make our application dynamic. The re-rendering of the parent component will cause the re-rendering of the child component. It means that the child component will also be re-rendered with new data (props).
Let us implement a stand-alone Todo application that has separated components and uses the parent-child approach to transfer data between components via props to make our application dynamic:
TodoApp
This application has one state todos to store tasks. This state can be passed to the child component via props.

We have an input field and a button to add a new task. We can decide to create a separate component, but it does not matter in our case since this input is not needed elsewhere in the app:
We also need a state that holds the input value.
function TodoApp() {
  const [tasks, setTasks] = useState([]);
  const [inputText, setInputText] = useState("");

/** task structure:
* {text, id, isDone)
*/

  const addTask = () => {
    if (inputText.trim() !== "") {
      setTasks([...tasks, { text: inputText, id: Date.now(), isDone: false }]);
      setInputText("");
    }
  };

  return (
    <div>
      <h1>Simple To-Do App</h1>
      <div>
        <input
          type="text"
          placeholder="Enter a task"
          value={inputText}
          onChange={(e) => setInputText(e.target.value)}
        />
        <button onClick={addTask}>Add</button>
      </div>
)}
We have two lists, one for tasks that have to be done and another for tasks that have been done. We will not create two lists, but a ItemsList component that will be used to list out items according to their status:
The ItemsList component needs some information. For now, items to list. Everything will be passed via props.
We will create an TodoItem component for each item to list out. This component is in charge of displaying item details with some action buttons:
A button to delete the task
A button to make a task done or undone
So, since those actions will update the todos state which is a parent component state, we need the setter function for the todos (setTodos) state inside the TodoItem component to perform those actions. We can either pass setTodos directly to the children components or create handler functions that use the todo's setter function in the parent component and pass those handler functions to the children component, which allows us to keep a modular code structure.
But for this specific case, the TodoApp is like an ancetre of TodoItem. So, the TodoApp will pass the handler functions to ItemsList and then ItemsList forwards them to TodoItem
Update the
TodoApp:function TodoApp() { const [tasks, setTasks] = useState([]); const [inputText, setInputText] = useState(""); const addTask = () => { if (inputText.trim() !== "") { setTasks([...tasks, { text: inputText, id: Date.now(), isDone: false }]); setInputText(""); } }; const deleteTask = (id) => { const updatedTasks = tasks.filter((task) => task.id !== id); setTasks(updatedTasks); }; const setTaskDone = (id) => { const updatedTasks = tasks.map((task) => { if (task.id === id) { task.isDone = !task.isDone; return task; } else { return task; } }); setTasks(updatedTasks); }; return ( <div> <h1>Simple To-Do App</h1> <div> <input type="text" placeholder="Enter a task" value={inputText} onChange={(e) => setInputText(e.target.value)} /> <button onClick={addTask}>Add</button> </div> </div> ); }Create the
TodoItemcomponent:function TodoItem({ deleteItem, setItemDone, item: { id, isDone, text } }) { return ( <li> {text} <button onClick={() => deleteItem(id)}>Delete</button> <button onClick={() => setItemDone(id)}> {isDone ? "Undone" : "Done"} </button> </li> ); }We destructure properties from the props object. The
deleteItemandsetItemDoneare handlers passed fromTodoAppviaItemsList.Create the
ItemsListcomponent:function ItemList({ items, deleteTask, setTaskDone }) { return ( <ul style={{ width: "16rem", padding: "1rem", display: "flex", flexDirection: "column", gap: ".5rem", }} > {items.map(({ id, text, isDone }) => ( <TodoItem key={id} item={{ text, isDone, id }} deleteItem={deleteTask} setItemDone={setTaskDone} /> ))} </ul> ); }As you can see, the
deleteTaskandsetTaskDonehandlers are forwarded to theTodoItemcomponent.Add lists to the
TodoApp:function TodoApp() { const [tasks, setTasks] = useState([]); const [inputText, setInputText] = useState(""); const addTask = () => { if (inputText.trim() !== "") { setTasks([...tasks, { text: inputText, id: Date.now(), isDone: false }]); setInputText(""); } }; const deleteTask = (id) => { const updatedTasks = tasks.filter((task) => task.id !== id); setTasks(updatedTasks); }; const setTaskDone = (id) => { const updatedTasks = tasks.map((task) => { if (task.id === id) { task.isDone = !task.isDone; return task; } else { return task; } }); setTasks(updatedTasks); }; return ( <div> <h1>Simple To-Do App</h1> <div> <input type="text" placeholder="Enter a task" value={inputText} onChange={(e) => setInputText(e.target.value)} /> <button onClick={addTask}>Add</button> </div> <div style={{ display: "flex", gap: "1rem" }}> <div> <h5>Todos</h5> <ItemsList deleteTask={deleteTask} setTaskDone={deleteTask} items={tasks.filter((item) => item.isDone == false)} /> </div> <div> <h5>Done</h5> <ItemsList deleteTask={deleteTask} setTaskDone={setTaskDone} items={tasks.filter((item) => item.isDone == true)} /> </div> </div> </div> ); }
The final code is here
Pass React component as a props
When you wish to give a custom component to another component for rendering or behavior customization, it's usual practice to use a React component as a prop.
Let us imagine you wish to create an AuthModal component to:
Create a new account
Login into an account
In this case, the content of our Modal will not necessarily be the same when the user wants to create a new account and when the user wants to log into their account, the structure of the header and/or the footer could be the same for our AuthModal:
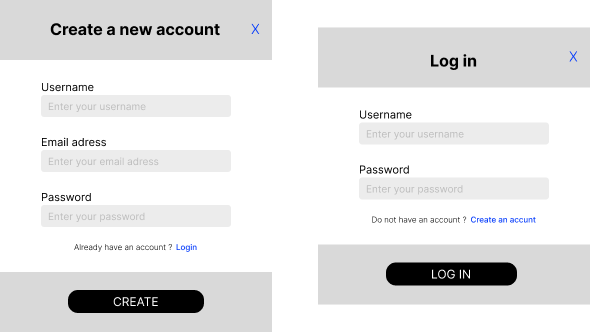
The header and footer have the same structure as shown, but the body (form) changes. We may reuse the AuthModal component by preserving the header/footer structure and passing a custom form via props:
function RegisterForm() {
  return (
    <form>
      <div>
        <label htmlFor="username">Username</label>
        <input id="username" type="text" />
      </div>
      <div>
        <label htmlFor="password">password</label>
        <input id="password" type="password" />
      </div>
    </form>
  );
}

function AuthModal({ title, body, action }) {
  return (
    <div className="auth_mod">
      <header>
        <h5>{title}</h5>
      </header>
      <main>{body}</main>
      <footer>
        <button>{action}</button>
      </footer>
    </div>
  );
}

function App() {
  return (
    <>
      <AuthModal body={<RegisterForm />} title={"Login"} action={"LOG IN"} />
    </>
  );
}
In React, we can directly wrap the form with the AuthModal and receive the wrapped form in a special props called children.
function AuthModal({ title, children, action }) {
  return (
    <div className="auth_mod">
      <header>
        <h5>{title}</h5>
      </header>
      <main>{children}</main>
      <footer>
        <button>{action}</button>
      </footer>
    </div>
  );
}

function App() {
  return (
    <>
      <AuthModal title={"Login"} action={"LOG IN"}>
        <form>
          <div>
            <label htmlFor="username">Username</label>
            <input id="username" type="text" />
          </div>
          <div>
            <label htmlFor="password">password</label>
            <input id="password" type="password" />
          </div>
        </form>
      </AuthModal>
    </>
  );
}
In this situation, the component wrapped by the AuthModal is considered as a child.
Passing JSX as props is a powerful pattern that allows us to compose and structure our components in a reusable and customizable way. By passing different children, you can change the content of a component without having to create new components for each variant.
Reserved props
React has reserved props (key, ref). So, do not use "key" or "ref" when naming your props.
Higher-Order Components (HOCs)
Higher-order components (HOC) are a sophisticated React approach for reusing component logic as well as isolating logic shared by multiple components. They accept a component as an argument and return it with improved functionality.
Assume you wish to restrict access to certain components of your application to users who are not admins. You might be tempted to write this logic for each of those components; however, this would be a violation of the DRY principles. The most efficient method is to encapsulate this functionality in a higher-level component and use it for every component that is expected to have this feature.
Let us see how
We will implement a dashboard page that requires admin roles:
Create the dashboard component:
  function Dashboard() {
    return <div className="dashboard">Dashboard</div>;
  }
Then, create a higher-order component that takes a component
WrappedComponentas an argument and returns that component based on the user's role. This higher-order component will also accept an additional argumentcheckRolewhich is a function that checks the user's role:// The dashboard component function Dashboard() { return <div className="dashboard">Dashboard</div>; } // function to check if the user is an admin function checkRole(userRole) { return userRole === "admin"; } // The higher order component function WithAuthaurization(WrappedComponent, checkRole) { return function (props) { return checkRole(props.role) ? ( <WrappedComponent {...props} /> ) : ( <p>Please login with appropriate role</p> ); }; } // The dashboard component with an additional feature (Authorization) const DashboardWithAuth = WithAuthaurization(Dashboard, checkRole) function App() { return ( <> <DashboardWithAuth username="credo23" role="admin" /> </> ); }
As you can see, the WithAuthorization function simply returns a functional component that wraps the WrappedComponent. Because the returned function is a React component, we can give all WrappedComponent props to it and then forward them to the WrappedComponent.
Now that the permission logic has been isolated in a higher-order component, it may be used with other components in the app. This approach allows us to save time and reduce code duplication.
Handling events
In web development, events represent actions that occur in the web browser. You can develop dynamic JavaScript applications that respond to any user activity, such as clicking with a mouse, scrolling through a webpage, touching a touch screen, and so on, by responding to events with event handlers.
Handling events in React is almost the same as handling events in HTML, but there are some syntax differences:
In React, events are named in
camleCaserather than lowercaseIn React, you pass function to the event handler rather than a string
React:
  function App() {
    return <button onClick={handleClick}>Send</button>;
  }
HTML:
<button onclick="handleClick()">Send</button>
We need to know that events work only for native DOM elements (buttons, input, div, p, etc.). So, if we try to add an onClick to a React component, it will be considered as a simple props:
function UserCard() {
  return (
    <div>
      <h4>Username: {props.name}</h4>
      <p>Role: {props.bio}</p>
    </div>
  );
}

function App() {
  return (
    <>
      <UserCard name={"John"} rolde={"Developper"} onClick={handleClick} />
    </>
  );
}
onClick is treated as a simple props in this context, and we can access it using props.onClick.
How to add event to a React element ?
Let assume we want to create a Button component that execute a function when cliking on it. Generary this function will be defined inside the appropriate component and passed as an attribute to a native DOM element that support the event (that listens to event).
For our component, we will use a button as native DOM element:
function Button() {
  function handleClick() {
    alert("Clicked");
  }

  return <button onClick={handleClick}>Send</button>;
}

function App() {
  return (
    <>
      <Button />
    </>
  );
}
Our, button will work as expected; when a user click on it, it will show an alert message.
handle followed by the name of the event. You'll frequently find onClick={handleClick}, onMouseEnter={handleMouseEnter}, and so on.Handler functions should not be invoked upon passing onClick={handleClick()}; if we do, they will be called for each render, which can cause unexpected behavior for your component.
| ✅ | ❌ |
onClick={handleClick} | onClick={handleClick()} |
What if the handler requires an argument?
Event handlers with arguments
If the handler requires arguments, it is best to pass a function that returns the handler called with the required arguments:
function Button(props) {
  function handleClick(action) {
    alert(`${action} clicked`);
  }

  return (
    <button onClick={() => handleClick(props.action)}>{props.action}</button>
  );
}
Passing event handlers as props
Frequently, you will want to design a dynamic button that can be shared across the application. In this case, we must provide all relevant information when calling the button component:
The content
The action to perform when clicking
Etc.
Instead of defining the handler directly within the component, we will get it via props. We only need to ensure that we have provided it to an HTML tag that supports the correct event:
function Button({ onClick, children }) {
  return <button onClick={onClick}>{children}</button>;
}

function App() {
  return (
    <>
      <Button onClick={() => alert("Sent")}>Send</Button>
    </>
  );
}
Because it is based on the HTML button, our Button component works now as if it were an HTML button. Because it is a React component, we can additionally customize it to our own.
So, if you want your component to accept handlers like an HTML tag, wrap it in an HTML tag and forward event handlers to the HTML tag.
Naming event handlers passed as props
For HTML elements, we must adhere to the conventions for naming event handlers and use only predefined supported events. However, event handlers passed as props to a React component can have whatever name we wish:
It is still best to follow the naming convention: onSomething
function Button({ onRegister}) {
  return <button onClick={onRegister}>Register</button>;
}

function App() {
  return (
    <>
      <Button onRegister={() => alert("Registered !")}/>
    </>
  );
}
The React SyntheticEvent object
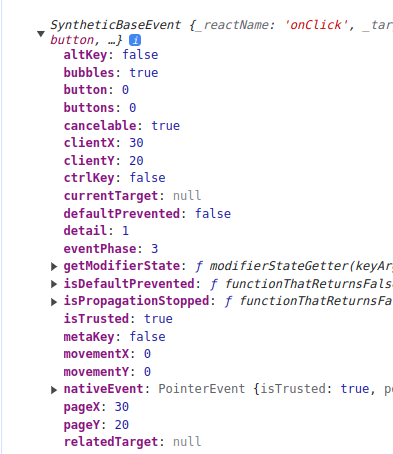
When an event handler is triggered, React creates a synthetic event object that provides the event properties and passes it to our handler as the first argument, so we need to consider it when creating event handlers:
function Button() {
  function handleClick(event) {
    console.log(event)
  }
  return <button onClick={handleClick}>Send</button>;
}
// OR
function Button() {
  function handleClick(event, secondParam) {
    console.log(event)
    console.log(secondParam)
  }
  return <button onClick={(event) => handleClick(event, secondParam)}>Send</button>;
}
It helps us to handle events in a consistent, efficient, and cross-browser manner and also offering control over event execution:
Access event propertie:
If you want to know more about the event, you can look at the SyntheticEvent object's properties.
  function Button() {
    function handleClick(event) {
      console.log(event.target); // Provides a reference to the DOM element that triggered the event.
      console.log(event.type); // Indicates the type of the event (e.g., 'click', 'change', 'submit').
      console.log(event.key); // Represents the key code of the pressed key for keyboard events.
      console.log(event.clientX, event.clientY); // Give the coordinates of the mouse pointer for mouse events.
    }

    return <button onClick={handleClick}>Send</button>;
  }
Prevent default behavior:
You may prevent the default behavior of certain events by using
event.preventDefault(). Prevent a form from submitting, or a link from navigating to a new web page, for example.handleSubmit(event) { event.preventDefault(); // Prevent the form from submitting // Perform custom logic here }Stop event propagation:
event.stopPropagation()prevents the event from spreading farther via the DOM tree, preventing parent or child components from processing the same event. Learn more about event propagation here.handleClick(event) { event.stopPropagation(); // Prevent event from bubbling up // Handle the event }Conditionally trigger action:
You can inspect event properties and conditionally triggers actions based on the event type or other properties.
  handleKeyPress(event) {
    if (event.key === 'Enter') {
      // Perform an action when the Enter key is pressed
    }
  }
Exercise: Quiz App
As usual, we are going to do an exercise that covers most of what we have learned in this post. As mentioned, we are going to do a quiz app. A dynamic quiz application that demonstrates the use of state management, prop passing, event handling, and higher-order components.
Instructions:
Set up the project:
Create a new React application using
create viteor your preferred method.Create multiple components:
QuizApp,Home,UserDetail,Question, andResult.
QuizAppComponent:Create a standalone
QuizAppcomponent that manages the quiz and the user state:quizState:
currentIndex: the current question
questions: an array of Questions (15)
userAnswer: the user's answer
correctAnswer: the correct answer
result: the result of the user
userInfo:
fullName: the full name of the user
email: the email of the user
Define an array of 15 quiz questions, each containing a question, multiple choices, and the correct answer.
Implement an event handler to check if the selected answer is correct. If so, increment the user's result in the quiz state.
Use the quizState to keep track of the current question and the user's score.
Implement an event handler to navigate between screens (home, quiz, result).
HomeComponent:Create a
Homecomponent that displays the intro message and a form to collect user info.Use event handlers to track input's values and set them to the userInfo state.
Prevent the user from starting the quiz if they did not set a valid full name and a valid email. Feel free to use Regex.
UserDetailsComponent:- Create a
UserDetailscomponent that displays the user's information (username and email).
- Create a
QuestionComponent:Create a
Questioncomponent that receives a question object (including choices and the correct answer) as a propQuizApp.Create an event handler that allows the user to set its answer by clicking on a choice and setting it to the quiz state.
Implement an event handler to move on to the next question. If we reach the last question, move on to the result screen.
Implement a handler to leave the quiz.
ResultComponent:Create a
Resultcomponent to display the user's details, final score, and a message based on their performance (e.g., "Great job!" or "You can do better!").This component should receive the final score as a prop from
QuizApp.Create an event handler to reset the quiz state when the user goes back to the home screen.
Higher-Order Component
WithTimer(HOC):Create a higher-order component called
withTimerthat wraps theQuestioncomponent.withTimershould add a timer feature to the question component, setting a limited amount of time to answer.If the timer runs out, the next question should be displayed.
Styling:
- Add CSS styles to make your Quiz App visually appealing.
Bonus Challenges:
Add a countdown timer for the entire quiz, not just individual questions.
Implement a review feature that allows users to revisit and change their answers before submitting the quiz.
Add animations and transitions for a more engaging user experience.
Implementation:
The
Homecomponent:import { useState } from 'react'; import styles from '../../styles/components/home.module.css'; import Button from '../shared/button'; import Input from '../shared/input'; export default function Home({ setView, handleUserForm, userInfo }) { const [error, setError] = useState({ fullName: '', email: '', }); const resetErrors = () => { setError({ fullName: '', email: '', }); }; const handleSubmit = e => { //Prevent default behavior e.preventDefault(); //Reset errors resetErrors(); const emailRegex = /^[a-zA-Z0-9._%+-]+@[a-zA-Z0-9.-]+\.[a-zA-Z]{2,}$/; /** * ^: Anchors the match to the start of the string. * [a-zA-Z0-9._%+-]+: Matches one or more characters that can be letters, digits, dots, underscores, percent signs, plus signs, or hyphens. This part represents the local part of the email address before the "@" symbol. * @: Matches the "@" symbol. * [a-zA-Z0-9.-]+: Matches one or more characters that can be letters, digits, dots, or hyphens. This part represents the domain name (excluding the top-level domain). * \.: Matches the dot before the top-level domain. * [a-zA-Z]{2,}: Matches at least two or more letters for the top-level domain (e.g., com, org, net). * $: Anchors the match to the end of the string. */ const fullNameRegex = /^[a-zA-Z-']{3,} [a-zA-Z-' ]{2,}$/; /** * ^: Anchors the match to the start of the string. * [a-zA-Z-' ]{4,}: Matches at least 4 characters that can be lowercase letters, uppercase letters, hyphens, or spaces. The {4,} quantifier specifies that there should be at least 4 characters, so with the initial uppercase letter, you have a total of at least 5 characters. * $: Anchors the match to the end of the string. */ const isValidEmail = emailRegex.test(userInfo.email); const isValidFullName = fullNameRegex.test(userInfo.fullName); if (isValidEmail && isValidFullName) { setView('quiz'); } else { if (!isValidFullName) { setError(prevE => { return { ...prevE, fullName: 'Please enter a valid full name e.g: John Doe', }; }); } if (!isValidEmail) { setError(prevE => { return { ...prevE, email: 'Please enter a valid email address e.g john.doe@example.com', }; }); } } }; return ( <div className={styles['home']}> <div className={styles['intro']}> <h3>React Quiz</h3> <p> Test your knowledge of React by answering the questions we've specially selected for you. <br /> <br />{' '} <b>It's fun and it's free</b>. </p> </div> <form onSubmit={handleSubmit} className={styles['form']}> <div className={styles['inputs_form']}> <Input onChange={e => handleUserForm(e, 'fullName')} label={'Full name'} placeholder={'Enter your full name'} value={userInfo.fullName} error={error.fullName} /> <Input label={'Email adress'} onChange={e => handleUserForm(e, 'email')} placeholder={'Enter your email adress'} value={userInfo.email} error={error.email} /> </div> <div style={styles['submit_button']}> <Button>Get started</Button> </div> </form> </div> ); }The
Questioncomponent:The
Choicecomponent:import styles from "../../styles/components/question/choice.module.css"; export default function Choice({ value, onCheck, checked }) { const handleCheck = (e) => { if (e.target.checked) { onCheck(); } }; return ( <label htmlFor={value} className={styles["label_option"]} > <input checked={checked} onChange={handleCheck} id={value} type="radio" /> <div></div> <p>{value}</p> </label> ); }```javascript import styles from '../../styles/components/question/index.module.css'; import Button from '../shared/button'; import Choice from './choice'; import { useEffect, useState } from 'react'; import WithTimer from '../../utils/withTimer';
function Question({ question, options, questionIndex, onNext, onFinish, onLeave, setUserChoice, time, onClearTime, }) { const [choice, setchoice] = useState(null);
const handleNext = () => { setUserChoice(choice); setchoice(null); // reset the choice, we will learn more in the next post #4 onClearTime(); onNext(); if (questionIndex == 15) { onFinish(); } };
const handleLeave = () => { setUserChoice(choice); setchoice(null); // reset the choice, we will learn more in the next post #4 onClearTime(); onLeave() }
/**
- Here, useEffect allows us to check the time once
- the Question component is rendered and not when rendering.
- The time variable passed as dependacies to allows to
- re-run it only if
timehas been changed. We will learn more in the next post #4 */ useEffect(() => { if (time == 15) { handleNext(); onClearTime(); } },[time]);
return (
); }{15 - time}{questionIndex}/15
{question}{options.map((option, index) => { return ( { setchoice(index); }} /> ); })}Leave {questionIndex < 15 ? 'Next' : 'Finish'}export default WithTimer(Question); ```
The
Resultcomponent:import styles from '../../styles/components/result.module.css'; import Button from '../shared/button'; import UserDetails from '../userDetails'; export default function Result({ userInfo, score, message, setView, resetStates, }) { return ( <div className={styles['result']}> <h3>Result</h3> <div className={styles['result_info']}> <div className={styles['user_details']}> <p>User details:</p> <UserDetails {...userInfo} /> </div> <div className={styles['score']}> <p>Score:</p> <div className={styles[score > 7 ? 'success' : 'failure']}> <h2>{score}/15</h2> </div> <p className={`${styles['message']} ${ styles[score > 7 ? 'success' : 'failure'] } `} > {message} </p> </div> </div> <div className={styles['action_buttons']}> <Button onClick={() => { resetStates(); setView('collectUserInfo'); }} > Home </Button> </div> </div> ); }The higher-order component
WithTimer:import { useState, useEffect } from 'react'; export default function WithTimer(QuestionComponent) { return function QuestionWithTimer(props) { const [time, setTime] = useState(0); let timerId; /** * Here, useEffect allows to only start the timer interval for the * first time this component is rendered and not for each render. * * We will learn more in the next post */ useEffect(() => { timerId = setInterval(() => { setTime((prevT) => prevT + 1); }, 500); }, []); const clearTime = () => { clearInterval(timerId) setTime(0) } return ( <QuestionComponent {...props} clearTime={clearTime} time={time} /> ); }; }As you can see i introduced the side effect concept for the higher order component for our exercise. If there is anything you do not understand, do not worry; we will go over it in more detail in the following chapter.
Challenge yourself to solve this exercise on your own. Do it many times so that you will learn to do it very well and have a good understanding of concepts used. You can use the final source code to help you out if you get stuck.
The final code is here.
Let me know in the comment section if you did it by congratulating yourself.
We learned a lot about useState in this article, including how to pass a parent component state to a child component using props, we learned how to deal with event handlers and how to add HTML tag behavior to react component by passing event handler via props. We also learned how to create higher order component in order to reduce code duplication. Not only that, but we noticed several best practices when dealing with component state. We can now use React to create a dynamic and interactive web app.
In the next article, we will dig deep with state, we will see how to choose a good state structure for your app. We will also see other hooks that that manage the state and how thy can be helpful for us to manage react state efficiently and sharing state between independents components. But before, we will start with the concepts of side effect for react components implemented by the useEffect hook.
Have you liked this reading? Connect with me on Twitter, LinkedIn, and GitHub for more articles like this.
Thank you for reading and sharing this with your network.
See you in the next part 💯.


